
PowerPoint Fundamentals
Week 3 — Lesson 1 | CI2000: Computer Fundamentals
Learning Objectives
- Given a healthcare training topic, create a new PowerPoint presentation using an appropriate template and consistent theme that establishes professional visual identity (CO-5)
- Build content slides using layouts, text placeholders, and visual elements (images, shapes) arranged for clarity and audience comprehension (CO-5)
- Organize a presentation's slide sequence to create a logical flow that guides the audience from introduction through key points to conclusion (CO-5)
- Evaluate a sample presentation's layout choices and identify which slide design decisions support or hinder audience understanding of healthcare information (CO-5)
Part 1 of 5 — The PowerPoint Interface: Your Presentation Workspace
Microsoft PowerPoint is the industry-standard presentation software used across healthcare organizations for everything from patient education materials to staff training sessions and departmental reports. Before you create your first slide, take a few minutes to familiarize yourself with the PowerPoint workspace — understanding the interface will make every task faster and more intuitive.
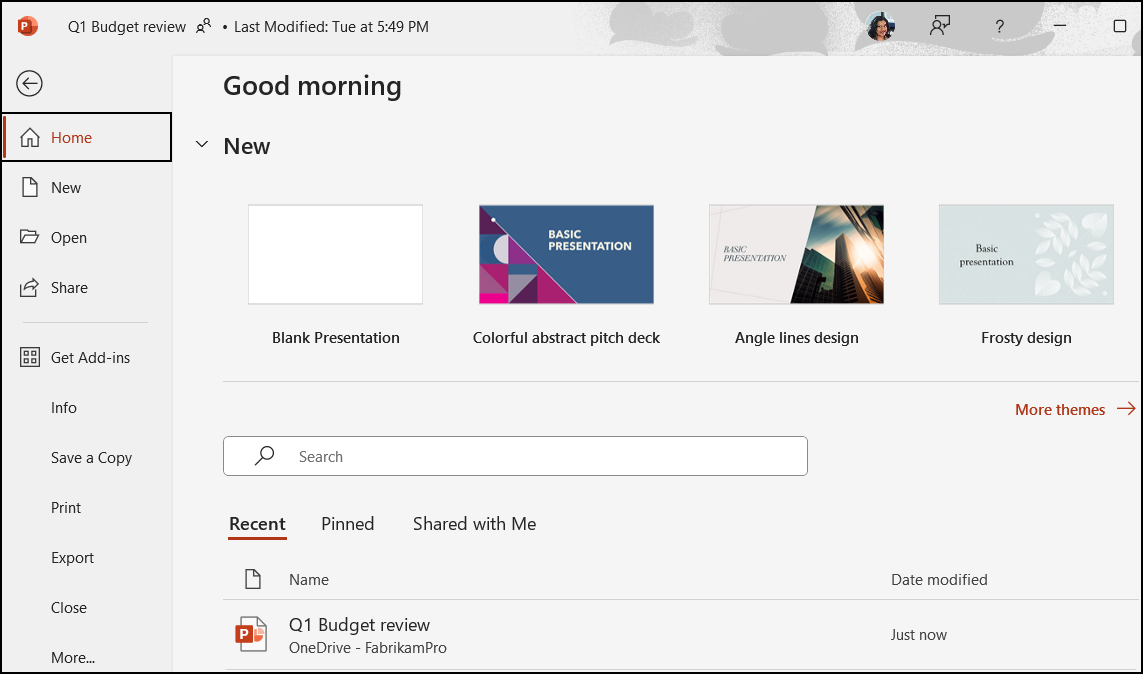
Launching PowerPoint and the Start Screen
When you open PowerPoint, you are greeted by the Start Screen. On the left side you will find a list of recently opened presentations, and on the right you will see a gallery of templates and themes. You can choose Blank Presentation to start from scratch, or select a professionally designed template that provides prebuilt layouts, color schemes, and placeholder text. For healthcare professionals, starting with a template can save significant time — Microsoft offers templates for training presentations, project reports, and educational materials that are easily adapted to clinical contexts.
The Ribbon and Tabs
The Ribbon is the horizontal toolbar at the top of the screen, organized into tabs. Select each tab below to learn what it contains:
Home tab – The most frequently used commands: clipboard operations (cut, copy, paste), font formatting (bold, italic, size, color), paragraph alignment, and slide management (new slide, layout, reset).
This is the tab you will use most often when building slides — nearly every text formatting and slide layout change starts here.

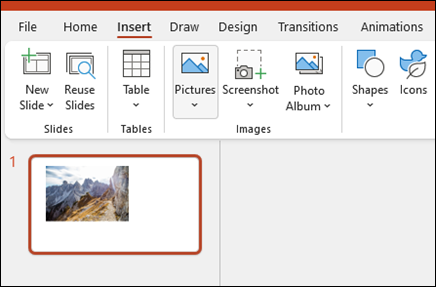
Insert tab – Add content to your slides: images, shapes, icons, SmartArt, charts, text boxes, headers/footers, audio, and video.
When your slide needs more than text — a clinical photograph, a process diagram, or an embedded video — the Insert tab is where you start.
Design tab – Apply and customize themes, color variants, slide size, and background formatting.
Use this tab to give your entire presentation a cohesive, professional look. Hover over any theme thumbnail to preview it live on your current slide before applying.
View tab – Switch between Normal, Outline, Slide Sorter, Notes Page, and Reading views.
Each view serves a different purpose — Normal for editing, Slide Sorter for rearranging, and Notes Page for reviewing speaker notes alongside each slide.
The Ribbon adapts to your current task. When you select an image, for example, a contextual Picture Format tab appears with tools for cropping, applying effects, and adjusting brightness and contrast.
Key Workspace Areas
Beyond the Ribbon, the PowerPoint window contains several important areas:
▢ Slide Pane
The large central editing area where you design the currently selected slide.
☰ Thumbnail Panel
Miniature versions of all slides on the left. Drag to rearrange, right-click to duplicate or delete.
✎ Notes Pane
Below the slide — type speaker notes visible only to you during Presenter View.
⋯ Status Bar
Shows slide number, total count, language, and the Zoom slider at the bottom of the window.
Healthcare Connection: Imagine you are a medical assistant asked to create a hand hygiene training presentation for your clinic. Before typing a single word, you would open PowerPoint, choose a clean professional template from the Start Screen, and then use the Ribbon's Insert and Design tabs to add your content. Understanding the interface is your foundation for building effective healthcare presentations.
Part 2 of 5 — Creating Presentations: Blank Slides, Templates, and Themes
PowerPoint offers multiple starting points for creating a presentation, each suited to different situations. Understanding when to use a blank presentation versus a template versus a theme will help you work efficiently and produce polished results from the start.
Starting with a Blank Presentation
Selecting Blank Presentation from the Start Screen creates a new file with a single white slide using the Title Slide layout. This is a clean canvas — no preapplied colors, fonts, or decorations. A blank presentation is useful when you want complete creative control or when you plan to apply a custom theme or organizational template later. In healthcare settings, blank presentations are common when your clinic provides a branded PowerPoint template file (.potx) that staff download and apply manually.
Using Templates
A template is a predesigned file that includes a coordinated set of slide layouts, themes, color schemes, fonts, background graphics, and sometimes sample content. Templates are accessed from the Start Screen or by navigating to File > New and searching the online template gallery. Microsoft provides thousands of free templates organized by category, including education, business, and healthcare-related designs.
When you select a template, PowerPoint creates a new file based on that template — the original template file is never modified. This means you can use the same template repeatedly for different presentations while maintaining consistent branding. For healthcare organizations, using a standardized template ensures that every presentation — whether it is a new-hire orientation, a patient education session, or a quality improvement report — looks professional and cohesive.
Applying and Customizing Themes
A theme is a coordinated set of design elements: colors, fonts, and effects (such as shadows and reflections) that give your presentation a unified appearance. Themes are applied from the Design tab on the Ribbon. Hover over any theme thumbnail to preview it live on your slide before selecting to apply it.
Every theme includes several color variants — alternative color schemes that use the same layout and fonts but swap the accent colors. Select the Variants group on the Design tab to browse options. You can further customize a theme by selecting Variants > Colors to choose a different color palette, Variants > Fonts to change the heading and body typefaces, or Variants > Background Styles to adjust the slide background.

Pro Tip: For a clinic presentation, start with a theme that uses a calming blue palette (similar to UMA's own navy and teal branding), then customize the accent colors to match your organization's identity. Consistent use of themes across an organization ensures that presentations from every department look like they belong together.
Saving and File Formats
Save your work early and often using Ctrl+S or File > Save. PowerPoint's default file format is .pptx (PowerPoint Presentation). Other useful formats include:
- .potx (PowerPoint Template) – Saves the file as a reusable template.
- .pdf – Creates a non-editable document ideal for distributing handouts to patients or staff.
- .ppsx (PowerPoint Show) – Opens directly in Slide Show mode, which is useful for kiosk displays in a clinic waiting room.
Healthcare Connection: A clinic administrator creating monthly staff training presentations can save a branded template (.potx) with the clinic's logo, colors, and standard slide layouts. Each month, a new presentation is created from this template, ensuring every training session has a consistent, professional look without starting from scratch.
▶ Top 15 Microsoft PowerPoint Tips and Tricks • Kevin Stratvert
Part 3 of 5 — Slide Layouts: Choosing the Right Structure
Every slide in PowerPoint uses a slide layout — a predefined arrangement of placeholders that determines where text, images, and other content appear on the slide. Choosing the correct layout for each slide ensures your content is organized logically and looks professional. According to Microsoft's documentation, slide layouts are the foundation of consistent, well-designed presentations.
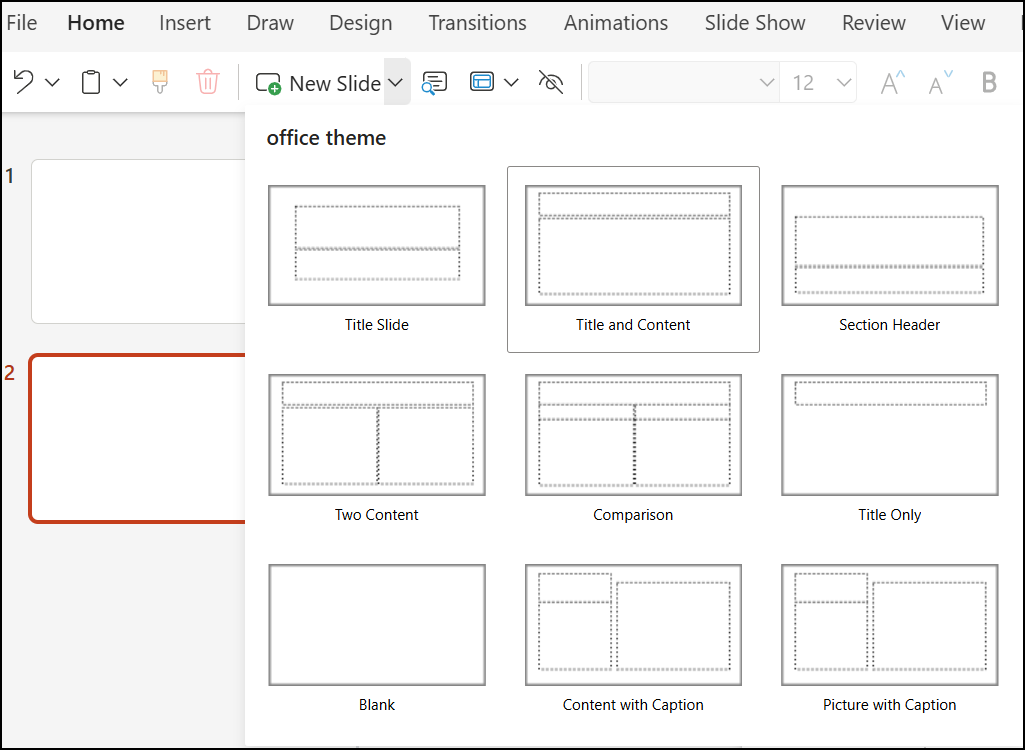
Built-In Slide Layouts
PowerPoint includes several standard layouts available from the Home tab > New Slide dropdown or by right-clicking a slide thumbnail and selecting Layout. Expand each layout below to learn when to use it:
Title Slide
A centered title and subtitle, used as the opening slide of your presentation. In a healthcare setting, this would display the presentation title (e.g., "Hand Hygiene Best Practices") and your name, department, and date.
Title and Content
The most versatile layout, featuring a title placeholder at the top and a large content placeholder below that accepts text, tables, charts, SmartArt, images, or video. This is the workhorse layout for most informational slides.
Two Content
Places two side-by-side content areas below a title. Ideal for comparing information, such as showing correct versus incorrect hand-washing technique, or displaying an image alongside explanatory bullet points.
Comparison
Similar to Two Content but adds subtitle placeholders above each content area, making it easy to label the two sides (e.g., "Before" and "After").
Blank
A completely empty slide with no placeholders. Use this when you want to position elements freely, such as creating a custom infographic or placing a full-bleed image.
Section Header
A large title area designed to introduce a new section of your presentation. In a lengthy training, section headers help the audience understand the transition between topics (e.g., moving from "Why Hand Hygiene Matters" to "Proper Technique").
Title Only
Shows only a title placeholder, leaving the rest of the slide open for manually placed content. Useful when you want to build a custom layout with precise control over element positioning.
Content with Caption
A main content area paired with a smaller text area for captions or annotations. Helpful when you need to show an image or chart alongside a brief explanation.
Changing Slide Layouts
You can change a slide's layout at any time without losing your content. Simply select the slide, go to Home > Layout, and choose a new layout. PowerPoint automatically repositions your existing content into the new layout's placeholders. This flexibility is valuable when you realize mid-project that a particular slide would work better with a different structure — for example, switching a text-heavy slide from Title and Content to Two Content so you can add an accompanying image.
Placeholders vs. Text Boxes
It is important to distinguish between placeholders and text boxes. Placeholders are the dotted-border areas built into slide layouts — they define where standard content goes and automatically adjust when you change themes or layouts. Text boxes, inserted from the Insert tab, are independent objects that you position manually. Best practice is to use placeholders whenever possible, because they respond to theme changes and maintain consistent positioning. Use text boxes only when you need content in a location not covered by a placeholder.
Healthcare Connection: When building a five-slide hand hygiene presentation, you might use: a Title Slide for your opening, Title and Content slides for each step of the hand-washing procedure, a Two Content slide showing correct technique alongside common mistakes, and a Section Header to introduce a quiz at the end.
| Layout Name | Description | When to Use in Healthcare |
|---|---|---|
| Title Slide | Centered title and subtitle placeholders | Opening slide for training sessions, patient education presentations, and department meetings |
| Title and Content | Title at top, single large content area below | Most informational slides: procedures, policies, bulleted lists, or single images with explanations |
| Two Content | Title with two side-by-side content areas | Comparing correct vs. incorrect procedures, image plus text, before-and-after scenarios |
| Comparison | Two content areas with subtitles above each | Labeled comparisons such as "Current Process" vs. "New Protocol" |
| Blank | No placeholders; fully open canvas | Custom infographics, full-bleed photographs, or freely arranged diagrams |
| Section Header | Large title for introducing a new section | Dividing a lengthy training into segments (e.g., "Part 1: Hand Hygiene" and "Part 2: PPE Usage") |
| Title Only | Title placeholder with open space below | Custom layouts where you manually position charts, images, or grouped objects |
| Content with Caption | Content area plus a smaller caption area | Displaying a medical image or diagram alongside a brief explanatory note |
Try It — Layout Selector: For each scenario below, identify the best slide layout.
Scenario 1: The first slide of a new employee orientation needs the clinic name, date, and presenter.
Title Slide — designed for the opening slide with a prominent title and subtitle, perfect for orientation cover slides.
Scenario 2: You need to show before and after patient satisfaction scores side by side with charts.
Two Content — splits the slide into two side-by-side areas, ideal for before/after comparisons.
Scenario 3: A slide featuring a full-screen photo of the new clinic building.
Blank — gives you a clean slate for full-screen images, just insert the photo and resize to fill the slide.
Part 4 of 5 — Entering and Formatting Text on Slides
Text is the backbone of most presentations. In PowerPoint, you enter text by selecting inside a placeholder or text box and typing. However, effective presentation text requires careful formatting to ensure readability, professionalism, and audience engagement.
Working with Placeholders and Text Entry
Select the "Click to add title" or "Click to add text" placeholder to begin typing. As you type, the text automatically wraps within the placeholder boundary. Press Enter to create a new paragraph or bullet point. Press Shift+Enter to create a line break within the same paragraph without starting a new bullet. This distinction is important when creating bulleted lists — for example, you might want a procedure step on one line with a clarifying note on the next line, all under the same bullet.
Font Formatting
The Home tab > Font group provides tools for formatting text appearance:
- Font family – Choose from available typefaces. For healthcare presentations, use clean, readable fonts like Calibri, Arial, or Segoe UI. Avoid decorative or script fonts that can be difficult to read from a distance.
- Font size – Presentation text should generally be 24 points or larger for body text and 36–44 points for titles. Text smaller than 20 points becomes unreadable in most presentation settings.
- Bold, Italic, and Underline – Use bold (Ctrl+B) to emphasize key terms such as medical terminology or critical safety steps. Use italic (Ctrl+I) sparingly for definitions or secondary information. Avoid underlining on slides, as audiences may confuse it with hyperlinks.
- Font color – Ensure sufficient contrast between text and background. Dark text on light backgrounds (or the reverse) is essential for readability, especially in clinical environments where presentations may be viewed on monitors with varying brightness.
Paragraph Formatting
The Paragraph group on the Home tab controls text alignment and spacing:
- Alignment – Left-align body text for readability. Center-align titles and headings. Avoid justified text on slides, as uneven word spacing reduces readability.
- Bulleted and numbered lists – Use bullets for unordered information (symptoms, supplies, tips) and numbers for sequential steps (procedures, protocols, instructions).
- Line spacing – Adjust line spacing from the Paragraph dialog box. Increase spacing to 1.2–1.5 for better readability on slides that contain multiple lines of text.
- Text indent – Use the Increase/Decrease Indent buttons to create hierarchical bullet levels, useful for outlining complex procedures with main steps and sub-steps.
Text Boxes and WordArt
When you need text outside of a placeholder, insert a text box from Insert > Text Box, then select and drag on the slide to create it. Text boxes are useful for adding callout labels, annotations, or footer information. WordArt (Insert > WordArt) creates decorative text with special effects like shadows, outlines, and gradients. In professional healthcare presentations, use WordArt sparingly — perhaps for a presentation title or section header — and ensure it remains legible.
Healthcare Connection: When creating a patient education slide about medication instructions, use a clear font like Calibri at 28 points, bold the medication name for emphasis, and use a numbered list for dosage steps. Patients viewing the presentation in a waiting room need to read the text easily from several feet away.
Part 5 of 5 — Working with Images, Shapes, and Slide Management
Visual elements transform a text-heavy presentation into an engaging learning experience. PowerPoint provides robust tools for inserting and formatting images and shapes, as well as features for managing and organizing slides as your presentation grows.
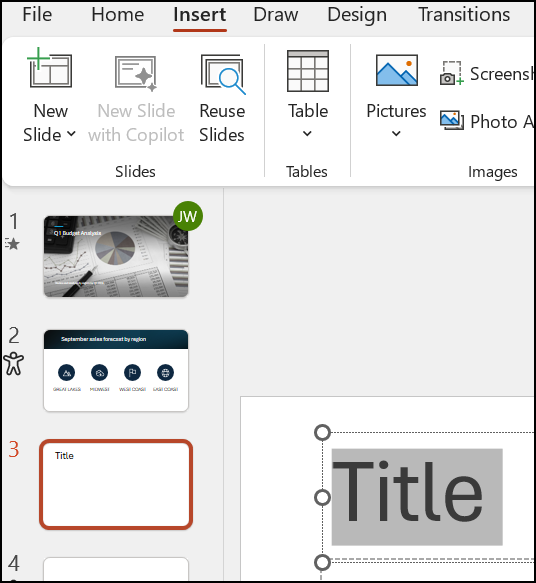
Inserting Images
Images bring healthcare presentations to life — a well-chosen photograph of proper PPE usage communicates more effectively than a paragraph of text. To insert an image, navigate to Insert > Pictures and choose your source:
- This Device – Insert an image file stored on your computer. Supported formats include JPEG, PNG, GIF, BMP, and TIFF.
- Stock Images – Access Microsoft's library of free, high-quality stock photographs, illustrations, icons, and cutout images directly within PowerPoint.
- Online Pictures – Search for images using Bing Image Search. Be mindful of copyright and licensing, especially for presentations that will be distributed externally.
Formatting Images
After inserting an image, select it to reveal the Picture Format tab on the Ribbon. Key formatting options:
Crop – Remove unwanted areas from the image. Use Crop to Shape to fit the image into a circle, rounded rectangle, or other shape for a polished look.
Resize – Drag corner handles to resize proportionally (hold Shift to maintain aspect ratio). Use the Size group for precise dimensions.
Position – Drag the image to any location on the slide. Use Align tools (Picture Format > Align) to center, distribute, or snap objects to the slide grid.
Precise alignment ensures your slides look polished and professional, especially when placing multiple images side by side.
Picture Styles – Apply preset styles such as rounded corners, soft edges, shadows, or reflection effects. Choose styles that enhance without distracting — a subtle shadow can make an image stand out against the background.
Corrections and Color – Adjust brightness, contrast, and color saturation. Use Color > Recolor to apply a color tint that matches your presentation's theme.
This is useful when you need to unify the look of images sourced from different places.
Inserting and Formatting Shapes
Shapes are versatile elements for creating diagrams, callout boxes, flowcharts, and visual frameworks. Navigate to Insert > Shapes to access a library of rectangles, circles, arrows, flowchart symbols, callout boxes, and more. Format shapes using the Shape Format tab: set fill color, outline weight, shape effects, and add text by right-clicking and selecting Edit Text.
Managing Slides: Rearrange, Duplicate, and Delete
As your presentation grows, you will frequently need to reorganize slides. PowerPoint offers several approaches:
Rearranging Slides
In the Thumbnail Panel, click and drag a slide to a new position. For large presentations, switch to Slide Sorter view (View tab > Slide Sorter), which displays all slides as thumbnails in a grid, making it easy to see the entire flow and drag slides to rearrange them.
Duplicating Slides
Right-click a slide thumbnail and select Duplicate Slide (or press Ctrl+D). Duplicating is useful when you need several slides with the same layout and formatting — create one slide, perfect it, then duplicate and change only the content. For a series of patient education slides with identical formatting, this saves significant time.
Deleting and Hiding Slides
Right-click a slide and select Delete Slide, or select the slide and press the Delete key. If you accidentally delete a slide, press Ctrl+Z immediately to undo.
You can also Hide Slide — the slide remains in your file but is skipped during the slide show. This is useful for backup slides containing additional data that you might reference only if the audience asks questions.
Speaker Notes for Presentation Preparation
The Notes Pane at the bottom of the Normal view lets you add detailed speaker notes to each slide. Select in the Notes Pane and type your talking points, data references, or reminders. During delivery, these notes appear only on the presenter's screen when using Presenter View. In a healthcare training presentation, speaker notes might include additional statistics, citation details, or instructions for facilitating a group discussion after a particular slide.
Healthcare Connection: You are building a hand hygiene training presentation for new clinical staff. Slide 1 uses a Title Slide with the presentation name. Slides 2–5 each use Title and Content with a step image on one side and procedure text on the other (Two Content layout). You duplicate Slide 2 as a starting point for Slides 3–5 to ensure consistent formatting, then use Slide Sorter view to verify the logical flow before adding speaker notes with WHO hand hygiene statistics for reference during delivery.
| View | How to Access | Best Used For |
|---|---|---|
| Normal | View tab > Normal (default view) | Day-to-day slide editing; working on individual slides with the Thumbnail Panel and Notes Pane visible |
| Outline View | View tab > Outline View | Organizing presentation structure by text content; useful for planning the flow of a training |
| Slide Sorter | View tab > Slide Sorter | Rearranging slides by dragging thumbnails; reviewing the overall sequence at a glance |
| Notes Page | View tab > Notes Page | Viewing each slide with its speaker notes in a printable format; ideal for rehearsal scripts |
| Reading View | View tab > Reading View | Previewing the slide show in a window (not full-screen); useful for reviewing without a full slide show |
| Slide Show | Slide Show tab > From Beginning (or F5) | Delivering the final presentation to an audience in full-screen mode |
Lesson 3.1 Summary
- The PowerPoint interface includes the Ribbon (with Home, Insert, Design, and View tabs), the Slide Pane, Thumbnail Panel, Notes Pane, and Status Bar.
- Start presentations from blank slides, templates (.potx), or themes — save early and often using Ctrl+S.
- Choose the correct slide layout (Title Slide, Title and Content, Two Content, Blank, Section Header, etc.) to match each slide's purpose.
- Format text using the Font and Paragraph groups: use 24pt+ body text, bold for emphasis, and numbered lists for procedures.
- Insert and format images using the Picture Format tab — crop, resize, align, and apply styles for professional results.
- Manage slides by rearranging, duplicating (Ctrl+D), deleting, and hiding — use Slide Sorter view for large presentations.
- Add speaker notes in the Notes Pane for reference during Presenter View without cluttering your slides.